This post will step you through how to create a new 12d Model project.
The video below will show how to create a new 12d Model Project using the TfNSW Customisation.
Continue down the page to see the Create a New 12d Model Project options.
To open create a new 12d Model Project simply “double click” on the TfNSW 12d Model icon on your desktop as shown below:

The 12d Model Open/New panel will open and to create a new project, select the <New> button at the bottom of the panel.

Ensure that the “New” tab is selected at the top of the panel.
Select the “Yellow Folder”, this is where we will set up the new 12d Model project location.
Select the directory: C:\User\Public\Projects, then hit the <New Folder> button and type in the new project name to create the new folder, as shown.

Next, ensure that the Folder location is correct, this is where the new 12d Model project is going to “live”.
Type in the new Project Name, for this example I have used: HV12345.
Untick the “Create Working Folder” option, and check the correct location for the new project is (for this example):
C:\User\Public\Projects\HV12345\HV12345.project
A description for the project can be added in this area of the panel, this description will be saved with the project.

An Environment Configuration needs to be selected – this will ensure that all of the TfNSW standards are loaded into the new project.
Hit the <Environment Configuration> button, and select the “TfNSW Survey” configuration and load it into the panel as shown
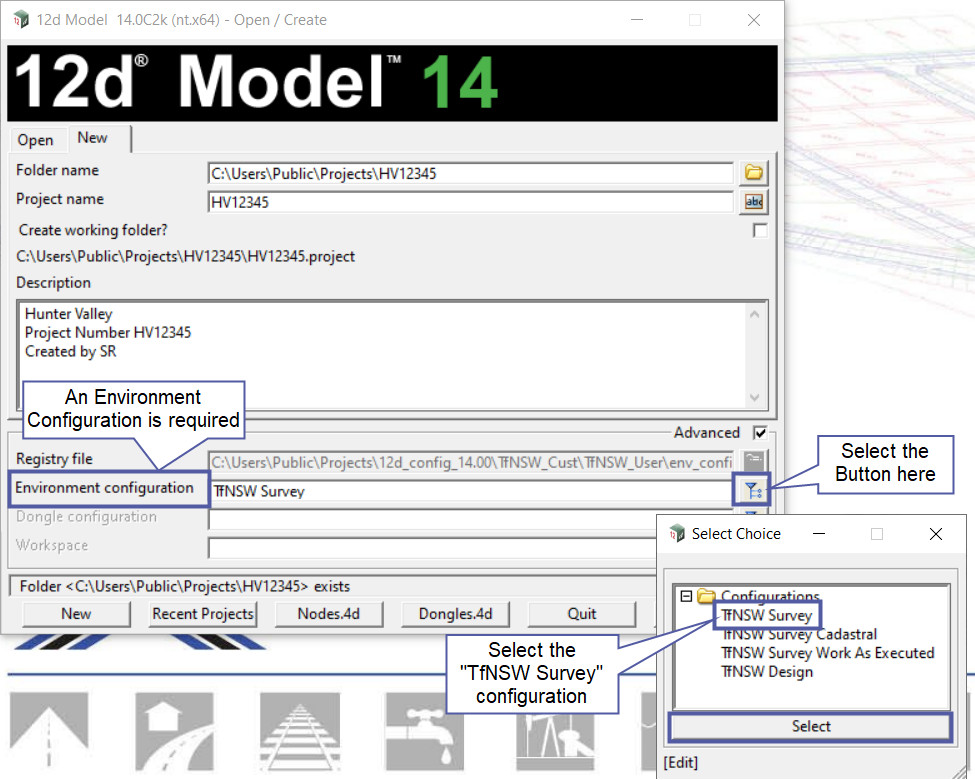
Ensure the panel is filled out as shown below.
Hit the <New> button to create the new 12d Model Project.

The 12d Model project has been created and opened, as shown below.

To learn about opening an existing 12d Model project,
Visit this post: Open an Existing 12d Model Project